On June 29 and 30, the field lights on Max Baer 1 field were
replaced with new Musco lights.
The lights are Metal-Halide lights, like the previous ones, but will provide
much more light than the old set, and be much more evenly distributed.
The old lights had dark spots on the field, especially in the outfield.
The company doing the installation is out of Modesto.
They have installed lights on many ball fields and stadiums.
This job was a retrofit, using the existing poles and wiring to the poles.
They often do the full new installation, including installing the poles.
I would like to thank them for their cooperation and patience with me as I took
photos of them working.
It was a 97 degree day when the lights were installed.
All of the photos here, plus many more can be found on the
photo site at:
https://elivermore.smugmug.com/LLIWS
The direct link to these photos is
HERE
Photos on the photo site are at full resolution, and can be downloaded for free.
Photos on this page are reduced in resolution for fast page loading.
Old
Lights and their removal
The first photos below are of the removal of the old lights,
which occurred on June 29, 2018.

Old lights on the pole near the photo booth on the 3rd base side. |

Old lights on one of the infield poles.
Those two poles had 3 lights each while the other four had 4 lights each.
|

One of the old bulbs in the fixture.
|

Old lights being removed. They used a band saw which went through the
metal posts in just a few seconds. |

Lowering the old lights to the ground. |

Removing the old boxes.
|

Three of the old bulbs. One of them was not in great shape.
|
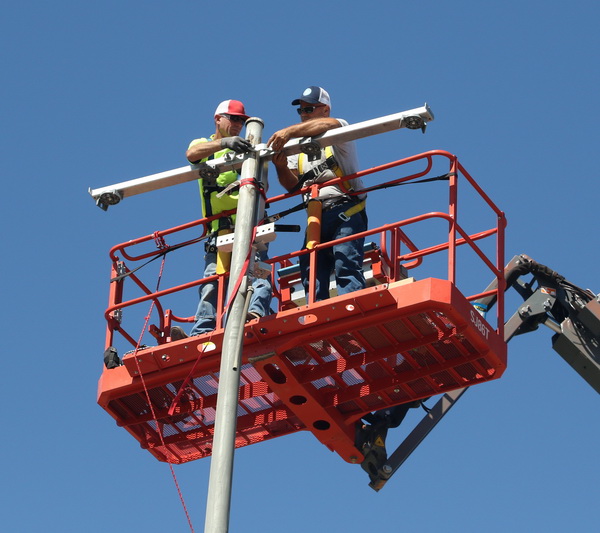
The
new lights
No aiming of the lights is necessary, as that was all done at the factory.
Using a computer model of the field, the exact positioning of each light was
determined.
This was used to set the position of the brackets on the mounting bars (see below), as
well as the tilt of each light at the factory..
The lights are numbered, and must be installed at the proper place as each has
the tilt is different on each.
To get the proper positioning, installers need to position the mounting brackets
at the right angle on the poles.
Each mounting bracket has a laser pointer installed at exactly the right
direction to point to home plate when the bracket is properly installed on the pole.
Photos below show the laser pointer, and an installer standing on home plate to
indicate to the others when the bar is properly positined.
Once the mounting bar is positioned properly, the lights are
mounted to the individual brackets, and they are pointing in the proper
direction.
back to top